MentorMe: Career Mentorship Service
Google UX Design Certification
This was my final assignment for Google’s UX Design Certification. The general prompt was to design a dedicated app for a career mentorship service. I took this app through the full UX design process, from research to ideation to design to testing. I created the information architecture, and even developed a simple design system.
TIMELINE
March 2022 tru May 2022
CLASS
Google UX Design Certification
DELIVERABLES
Dedicated mobile app
MY ROLE
Lead and sole UX Researcher and Designer
CONDUCTING USER INTERVIEWS
My first step was to conduct interviews with my target audience: individuals looking for career mentorship. Luckily, I had quite a few people in my social circle to interview.
The interviews were conducted over Zoom. Each lasted about 15 minutes. The questions included: “What steps are you taking to find career mentorship?” and “What frustrations do you have with the process?” I recorded each interview (with the subject’s consent) so that I could refer back to them when I synthesized the data.
SYNTHESIZING THE DATA
When my Zoom interviews were complete, I synthesized the data. I recorded each insight onto sticky notes in order to create an affinity map. After organizing my data, I found that I had four categories of insights: User Needs (what kind of help they’re looking for), User Does (actions the user has taken to find help), User Pain Points, and Ideas.
KEY RESEARCH TAKEAWAYS
After synthesizing the information gleaned from my personas and interviews, I was left with the following key takeaways:
- Introductions and re-introductions to new mentors waste a lot of time
- It would be useful to be able to book recurring meetings with the same mentor
- It would be useful to have a standard method of communication
ESTABLISHING THE USER FLOW
My first step in designing the app was establishing the user flow. I mapped out all of the decisions and actions related to the user’s progress through flows I was designing, specifically event scheduling and video chat.
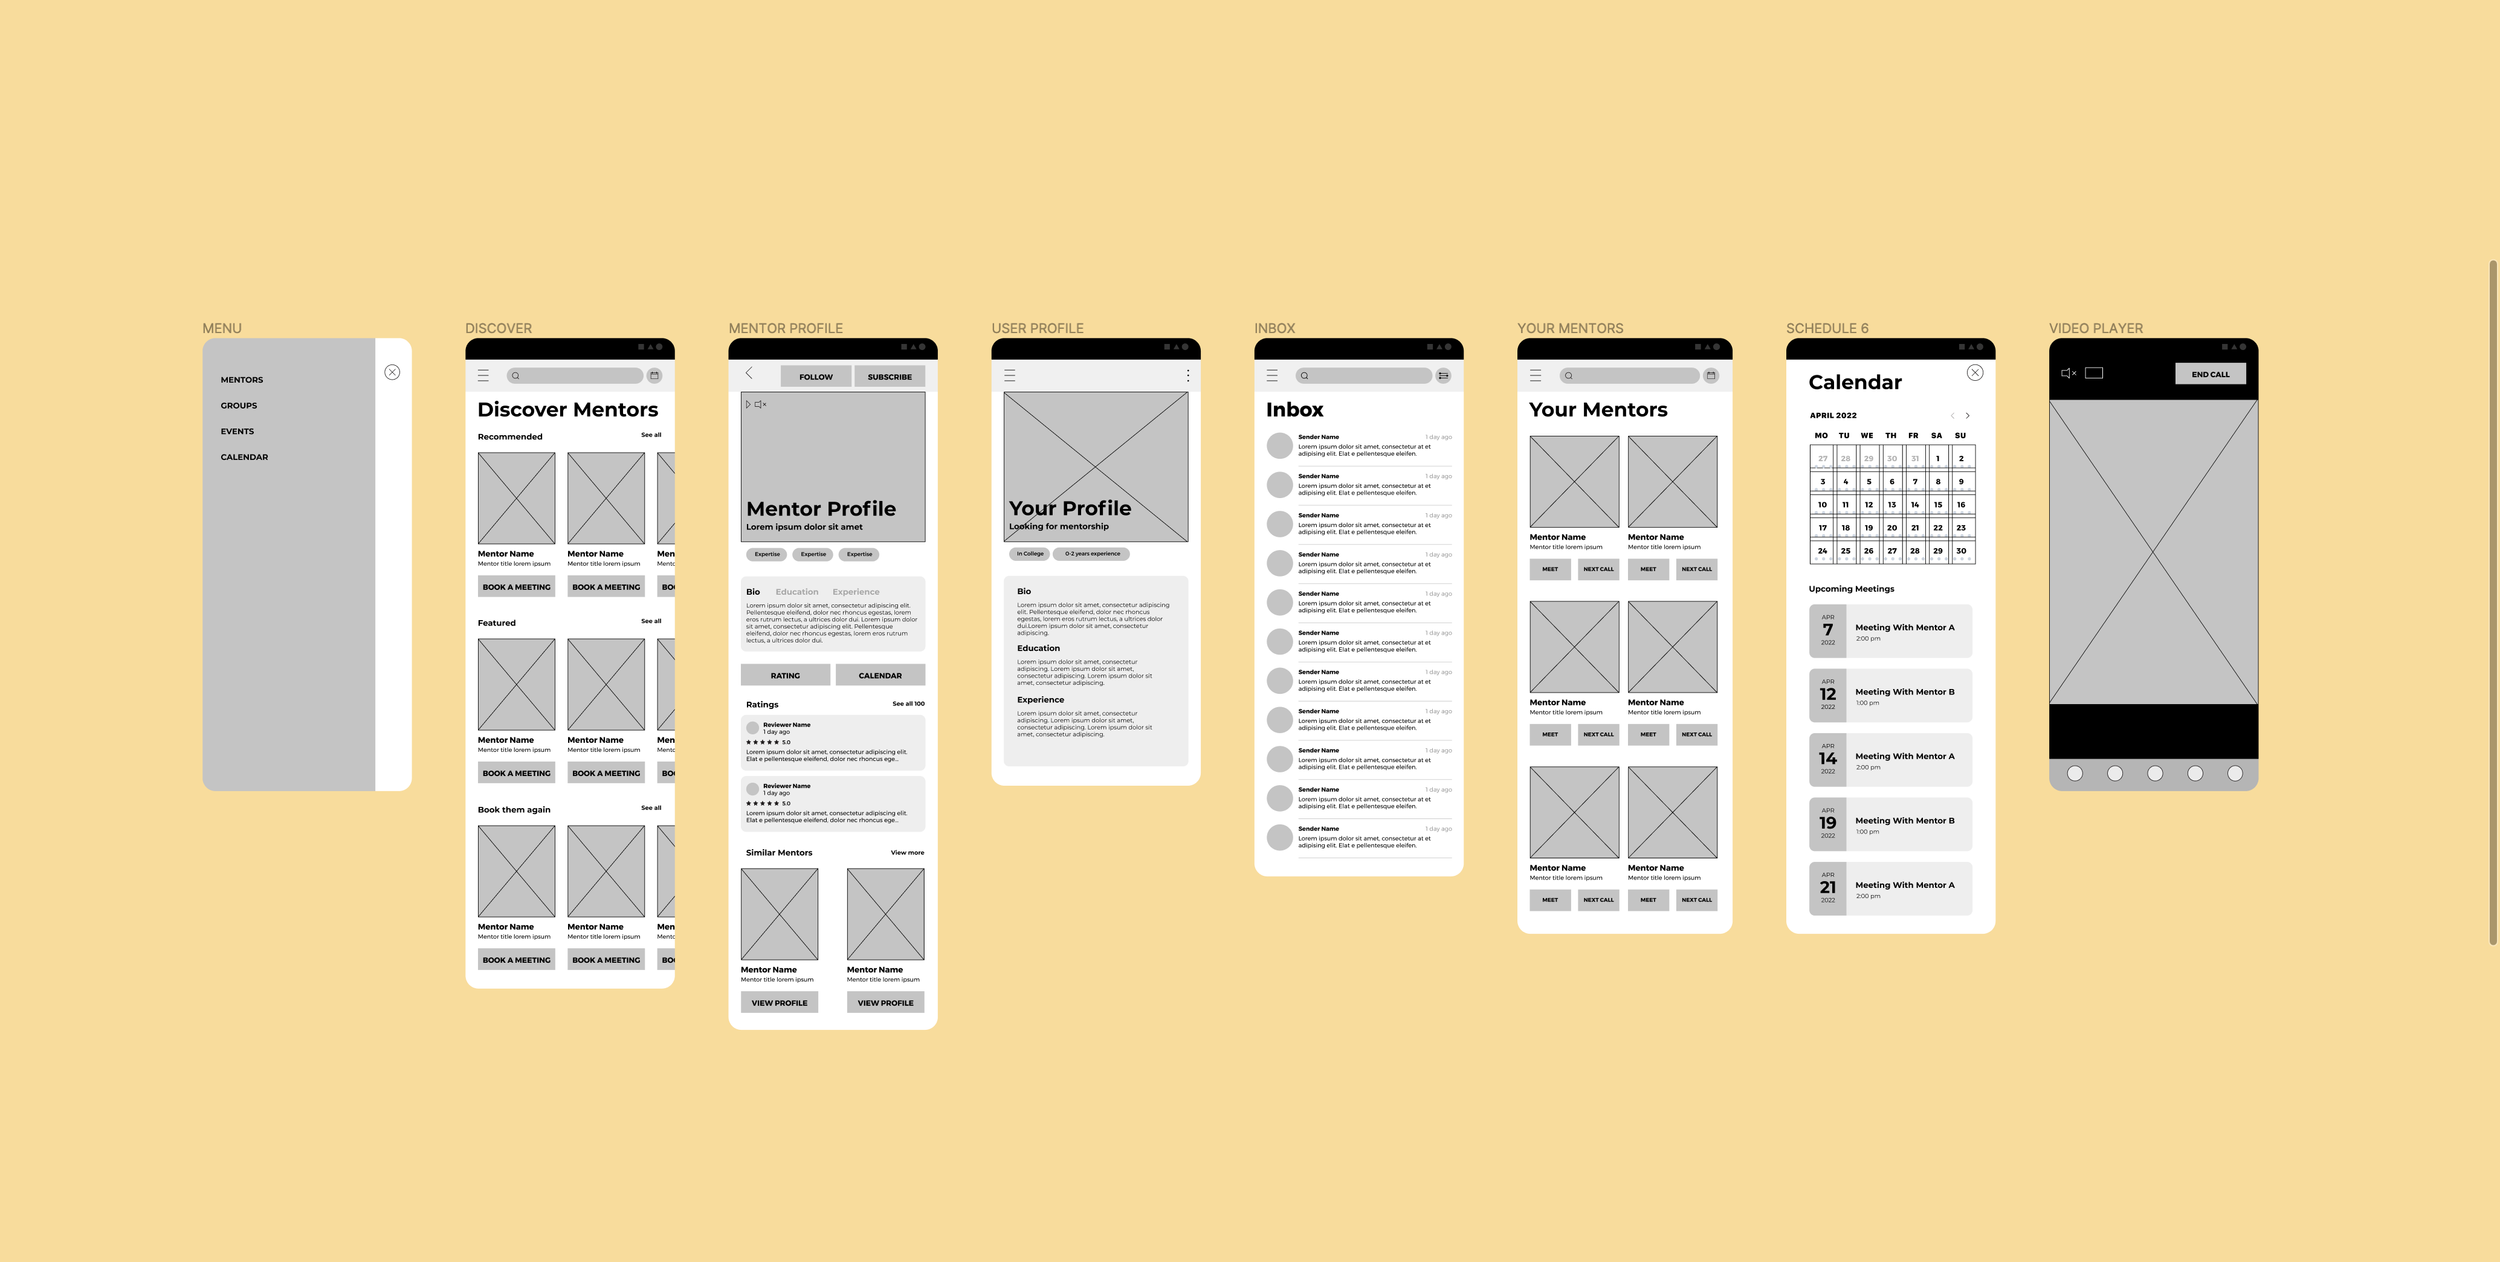
WIREFRAMING
With the user flow diagram as my guide, I developed wireframes for the key screens in the app. These included the main “Discover Mentors” page, a mentor profile, a user profile, a messaging screen, a “favorited” mentors page, a calendar, and a video chat screen.
MODERATED USER TEST
With the wireframes complete, I created a low-fidelity prototype of the app. Following my user flow diagram, I prototyped three of the key flows for the app: Finding and reviewing a mentor’s profile, scheduling a meeting with a mentor, and joining a call with said mentor. I then tested the prototype with five volunteers.
Participants:
Five participants
Ages 22-65
Test format:
Moderated usability test conducted over Zoom
Tasks Included:
Find a mentor’s profile
Book a meeting for a specific date and time
Find your inbox
Find your favorites
Find your profile
SYNTHESIZING THE FEEDBACK
After completing the usability tests, I went back to my trusty sticky notes and created another affinity diagram, this time pertaining to the problem areas in the low-fi prototype. Users had issues with three distinct areas: the inbox terminology, certain elements of the calendar flow, and the favorites icon.
KEY TESTING TAKEAWAYS
- Users were confused when asked to find the “inbox” because, to them, the chat icon said “messages.”
- Users found the layout of the event details page in the meeting scheduling flow confusing.
- Users were confused when asked to find their “favorited mentors” page, because they were looking for a heart icon, rather than the star used in the prototype.
WIREFRAME ITERATIONS
When iterating on my wireframes, I incorporated two key changes based on the key testing takeaways:
Terminology adjustment: During testing, users had found the term “inbox” confusing, so I changed the name of the IMing screen to “messages.”
Icon swap: Users had trouble with the original star icon for “favorites,” because they were expecting to see a heart. Following that feedback, I changed the star icon to a heart.
ESTABLISHING A STYLE
My first step in the visual design process was to create a style guide. This helped ensure that all of my elements were consistent. Creating my design system was also a good way to systematically check all of my design elements for accessibility. All color contrasts were double checked using the WebAIM contrast checker.
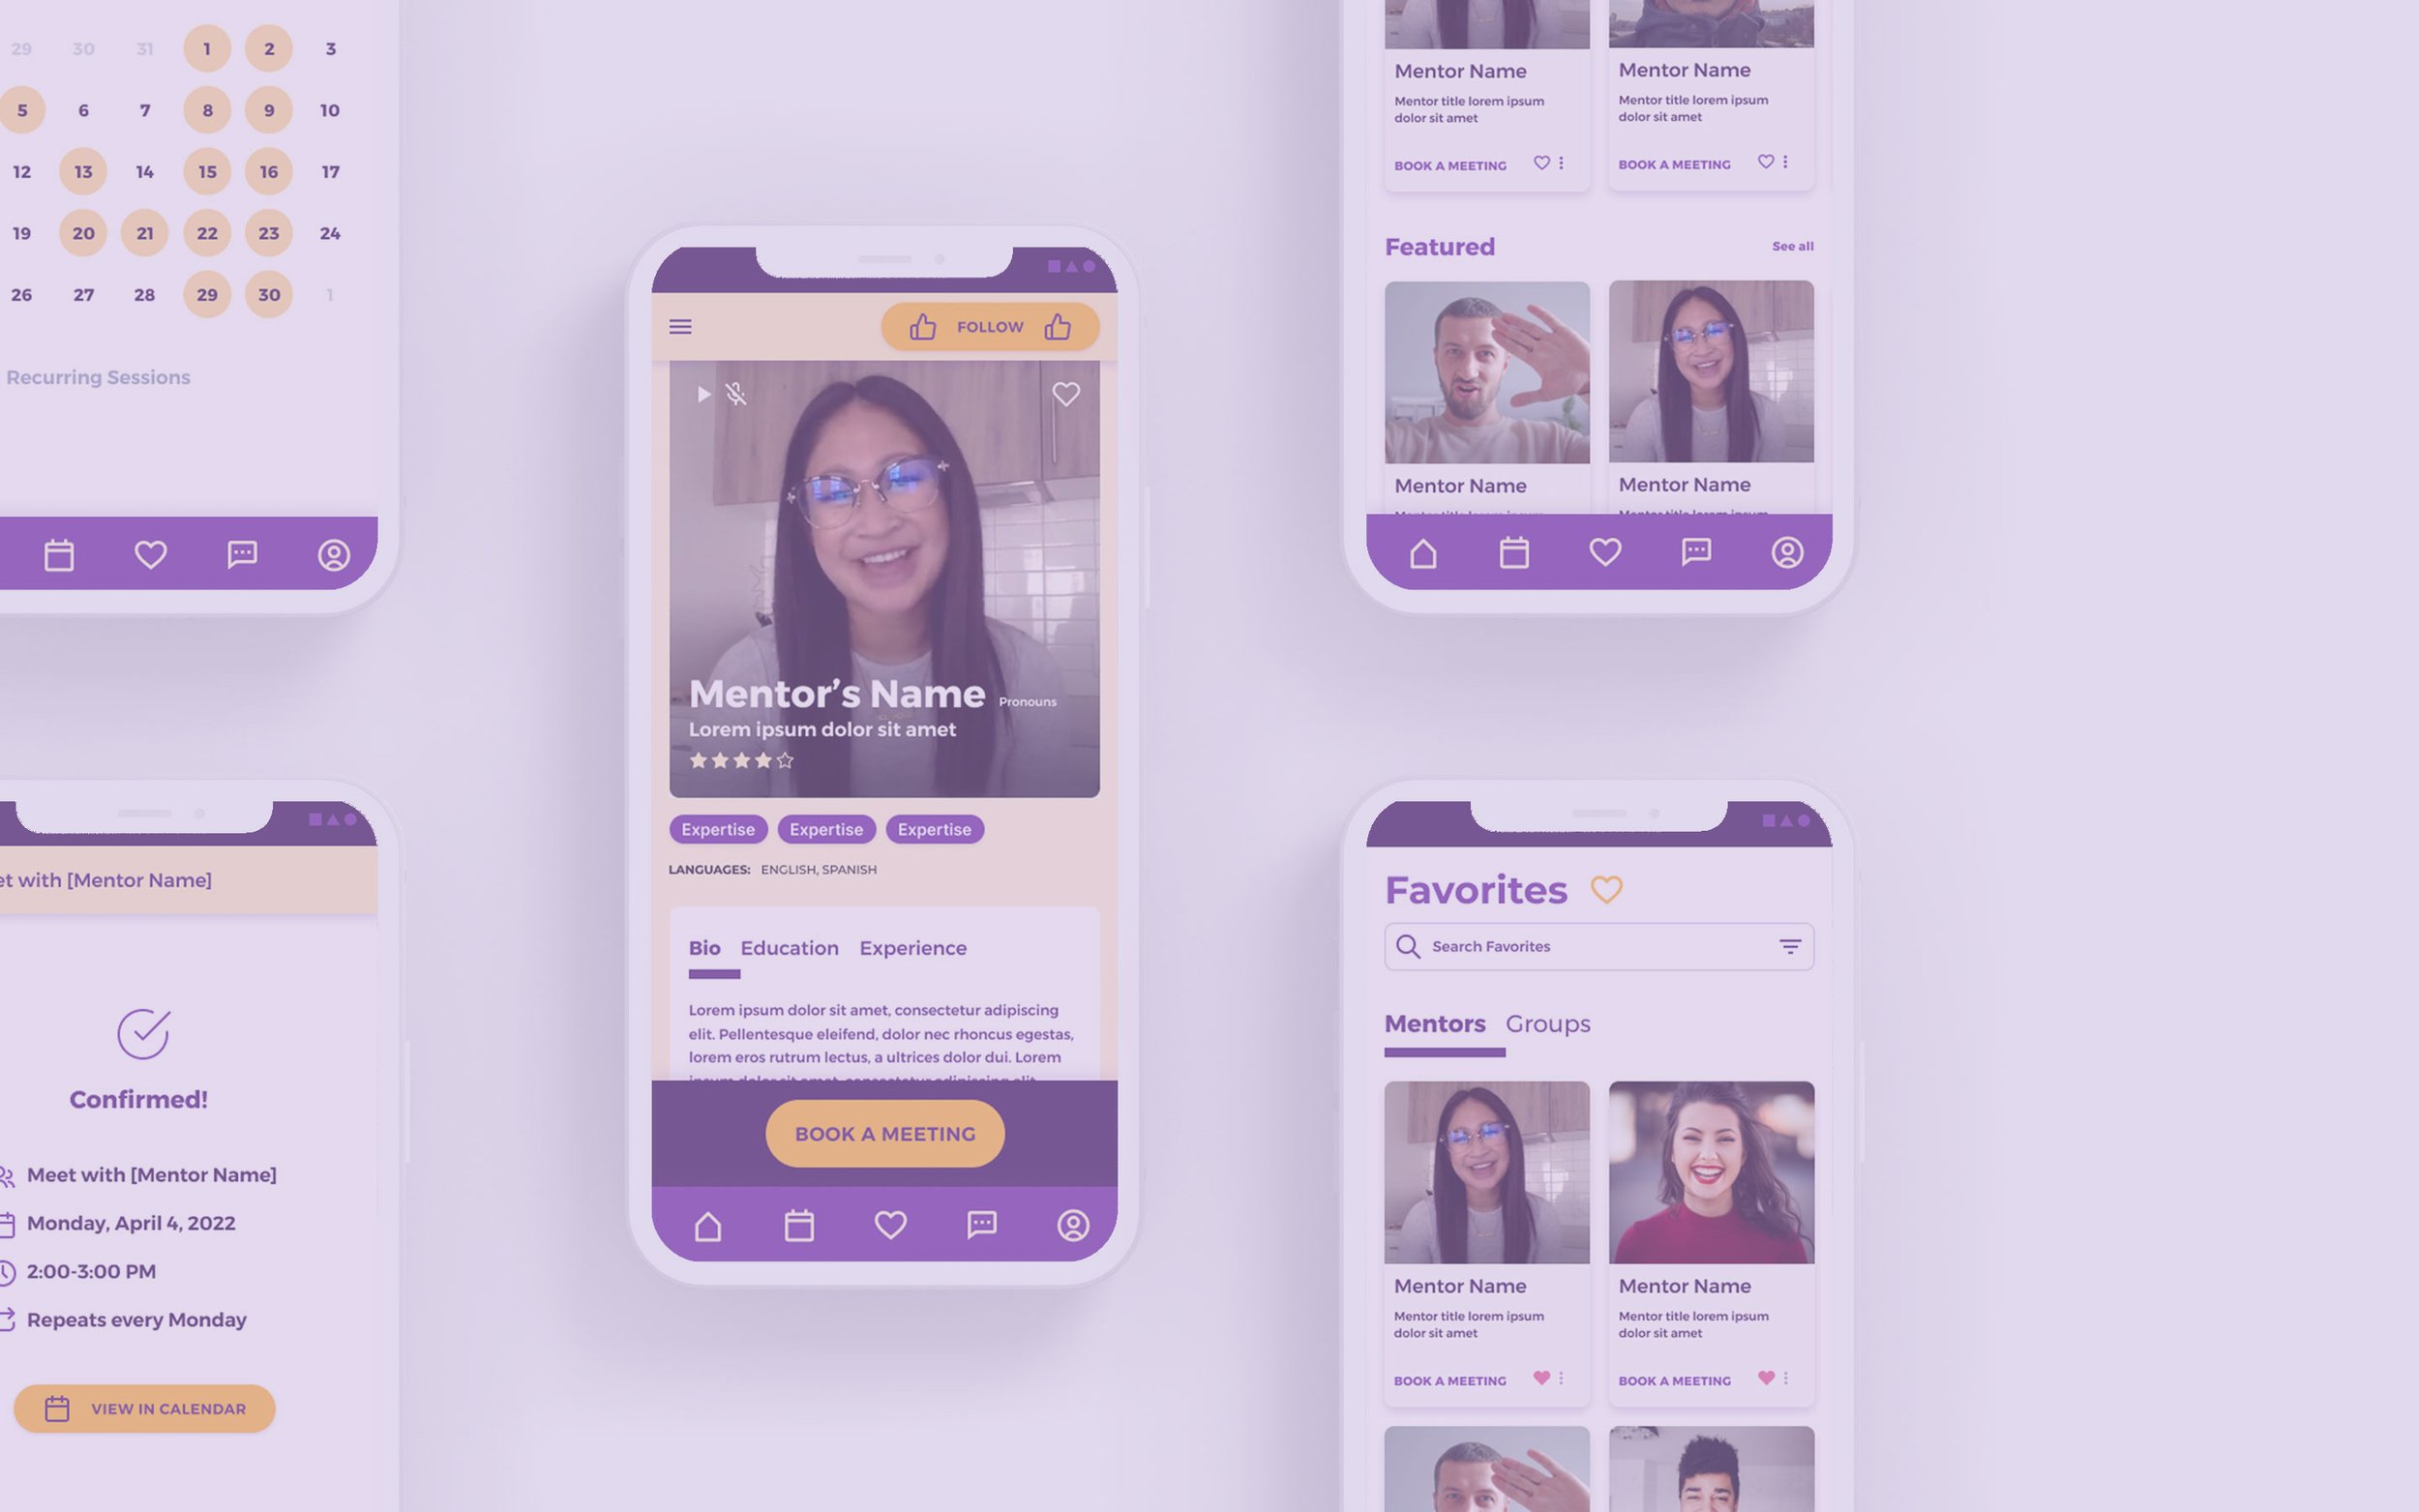
CREATING HIGH-FIDELITY APP DESIGNS

WRAPPING UP
Having wrapped this project and reflecting on the process in hindsight, there are a few changes I would make, had I had more time:
MATCHING: One of the features that I originally envisioned for this piece was a “matching” function for mentors and mentees, similar to Bumble, where you can match with people, but in a professional setting, rather than a social one.
FEASIBILITY: If this had been a real world project, rather than a class assignment, I would have consulted with an app developer throughout the process to ensure that the app I was designing was actually buildable.
MORE TESTING: During this project, I only had time to do one round of user testing on the low-fidelity prototype. In an ideal world, I would have done a round of testing after each iteration to ensure that my changes were truly improving the user experience of the app.